The satisfying thwack of a perfectly strung tennis racket is music to any player's ears. But that satisfying sound depends on proper stringing, a task that may seem daunting at first. Many players rely on professional stringers, but learning to restring your own racket can be a rewarding experience, saving you money in the long run and giving you a deeper understanding of your equipment. It allows for personalized tension and string choices, fine-tuning your racket to your specific playing style and preferences. Beyond the cost savings, the process itself can be surprisingly therapeutic and precise.
This seemingly complex process can be broken down into manageable steps. In this comprehensive guide, we'll walk you through each stage, from preparing your racket and choosing the right strings to knotting and finally tuning your newly strung masterpiece, so let's get started with our step-by-step instructions.
Preparation and Safety Guidelines
- Tennis racket
- Stringing machine
- Poly string
- Synthetic gut string
- Stringing tools (cutters, clamps etc.)
- Always wear safety glasses to protect your eyes from flying strings or broken pieces.
- Use the correct tension for your racket and string type; incorrect tension can damage the frame or the strings.
- If you are uncomfortable or unsure about any step, consult a professional stringer. Improper restringing can seriously damage your racket.
Step-by-Step Instructions
Remove Old Strings
- Remove old strings from the racket, starting from the center to distribute stress evenly.
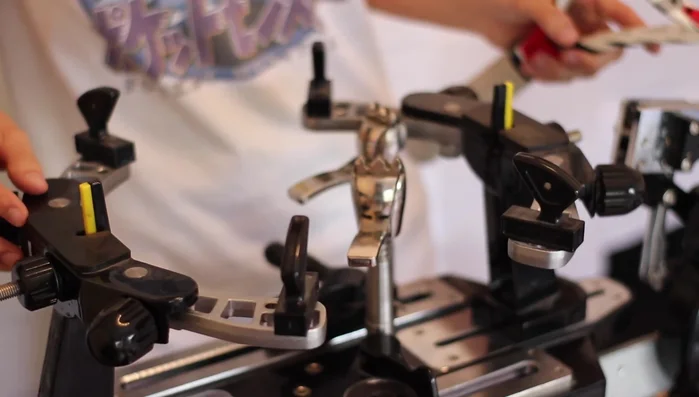
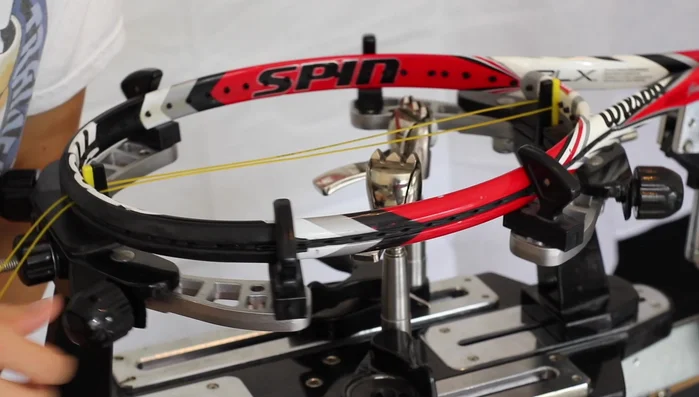
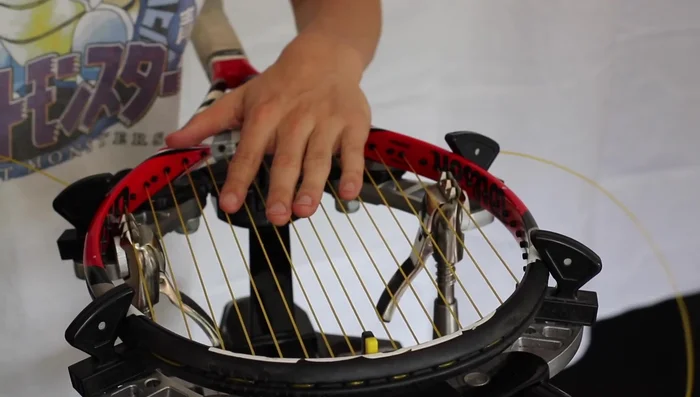
Mount Racket on Machine
- Mount the racket securely onto the stringing machine, ensuring the center is correctly aligned.

Mount Racket on Machine Prepare Main Strings
- Prepare the main strings (poly in this example) by cutting four arm lengths. Cut at a slight angle to aid feeding through the holes.
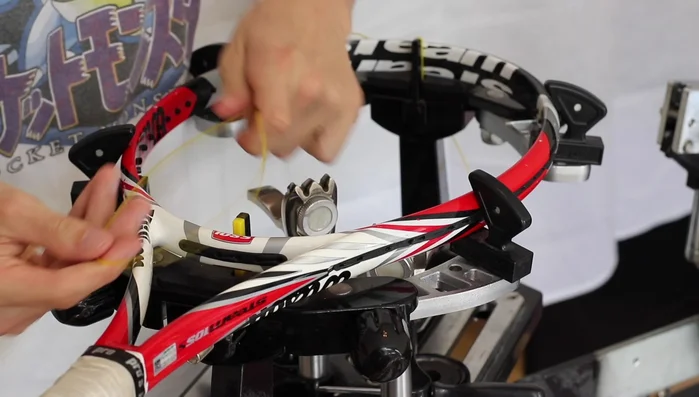
Determine Starting Loop Point
- Determine the starting point for your first loop based on the number of grommets (3 or 4) at the racket end.
Determine Starting Loop Point Thread First String
- Thread the first string through the middle grommet on one side, ensuring strings are straight and parallel.
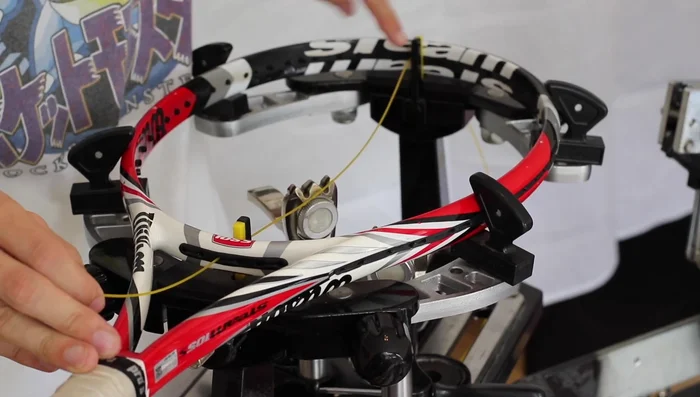
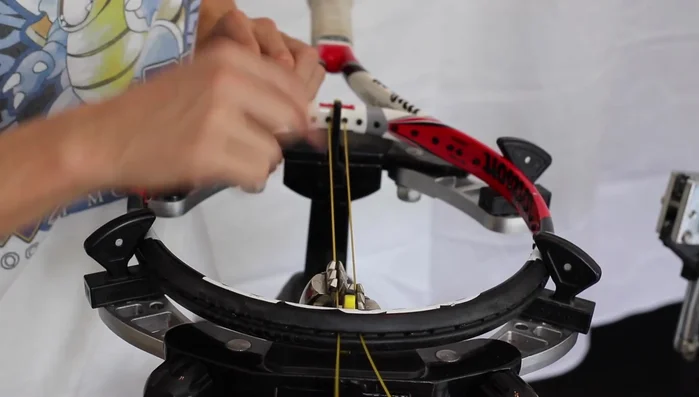
Thread First String Create First Loop
- Create the first loop by threading the string back through the adjacent grommet on the opposite side, pulling it up through the center.
Create First Loop Check String Length
- Check string length, ensuring both sides are equal. Adjust as needed.
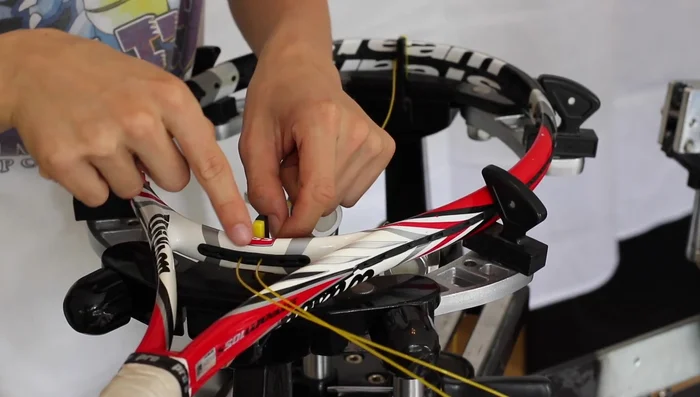
Check String Length Clamp and Apply Initial Tension
- Clamp one end of the string at the opposite end to your loop, applying gentle tension.
- Apply initial tension using the stringing machine (adjust tension as needed). Clamp the opposite end after pulling the string tight.
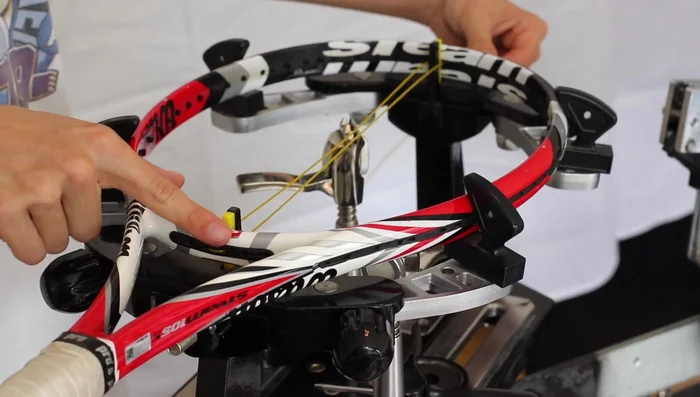
Clamp and Apply Initial Tension String the Remaining Mains
- Continue stringing the mains, working outwards from the center, one or two at a time, tightening each string as you go.
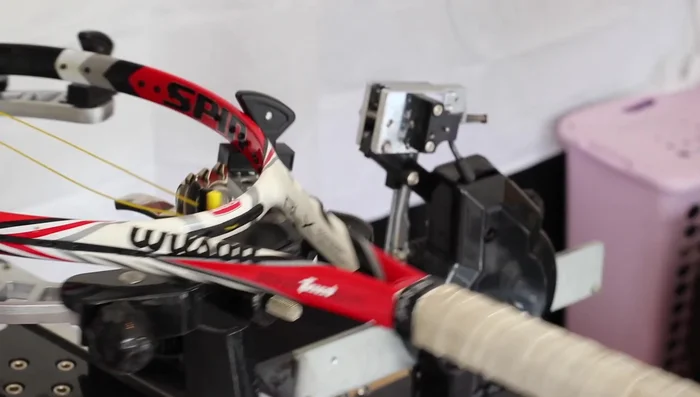
String the Remaining Mains Tie Off Main Strings
- Tie off the main strings at each end using a knotting method that secures the strings and prevents them from coming loose.
Tie Off Main Strings
Read more: Master Tennis Racket Stringing: The Fastest & Easiest Cross Stringing Technique
Tips
- Don't overtighten clamps during stringing, as this can damage the racket.
- When two grommets are very close together, skip one to avoid difficulties.
- If a string bends when attempting to thread it, trim the bent section for easier insertion.
- Practice knotting techniques separately before attempting on the racket.