Slinger bags, those innovative and portable training aids for athletes, offer a fantastic way to improve your game. But what happens when your trusty Slinger bag refuses to power on, leaving you stranded without your crucial training tool? Frustrating, right? A malfunctioning Slinger bag can derail your training schedule and leave you feeling helpless. Luckily, most power issues are easily resolved with a little troubleshooting. Don't let a dead battery or faulty connection ruin your workout.
This guide provides a comprehensive, step-by-step approach to diagnosing and fixing common Slinger bag power problems. We’ll cover everything from checking the battery and power cord to identifying more complex electrical issues. Whether you're a seasoned athlete or a new user, follow along as we walk you through the process of getting your Slinger bag back up and running so you can get back to training.
Preparation and Safety Guidelines
- Phillips head screwdriver
- Pressurized air can
- Always disconnect the Slinger Bag from the power source before attempting any repairs or troubleshooting.
- Never attempt to open or repair the internal components of the battery or power supply yourself. Doing so can void warranties and cause serious injury.
- If you are unsure about any repair steps, contact Slinger Bag customer support or a qualified technician. Improper repairs can damage the device and pose a safety risk.
Step-by-Step Instructions
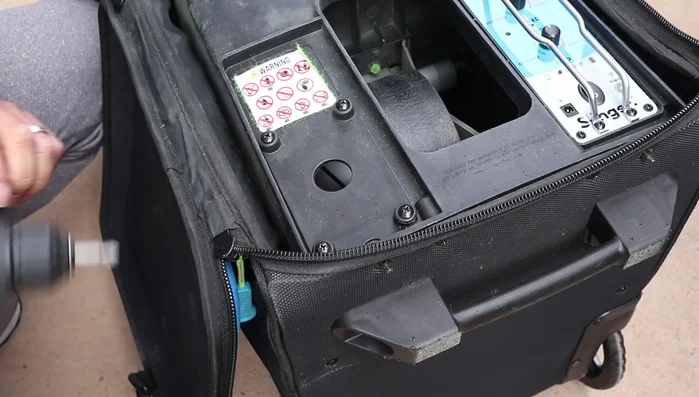
Access Internal Components
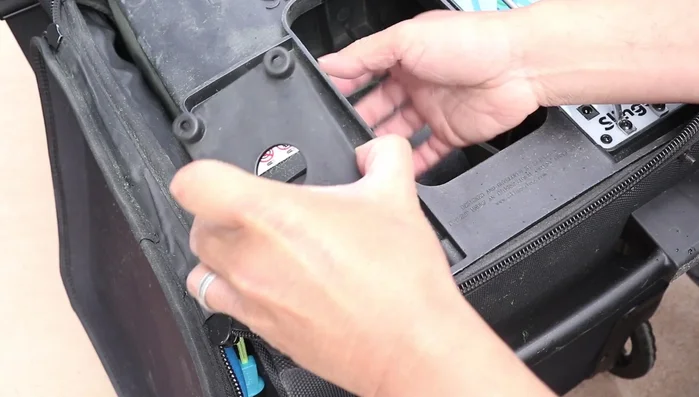
- Remove the battery by unscrewing four screws.
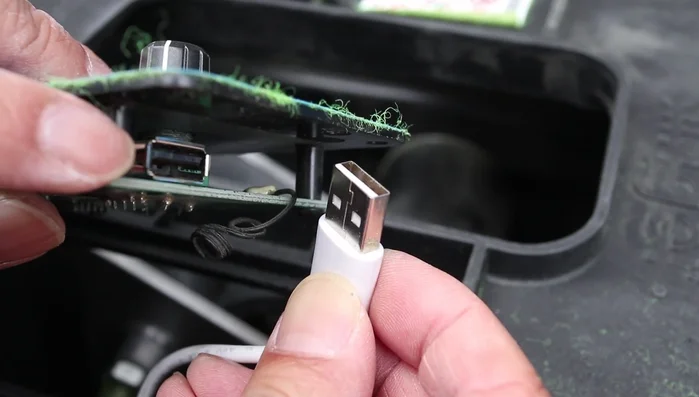
- Remove the control panel and circuit board by removing four screws and unplugging the USB connector.

Access Internal Components Inspect and Clean Connections
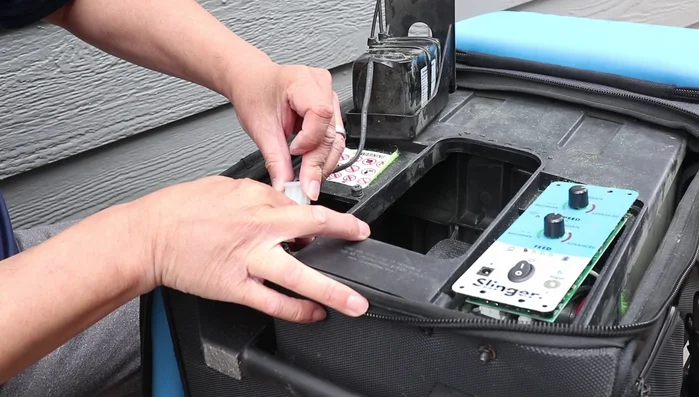
- Inspect the power connector. Disconnect it to check for clean contacts.
- Use pressurized air to clean debris, especially around the power switch and behind the dials.
Inspect and Clean Connections Reconnect and Test Power
- Reconnect the battery and test the power switch.
Reconnect and Test Power Reassemble and Verify Functionality
- Reassemble the Slinger Bag, carefully plugging in the USB cable.
- Test the USB plug in the side pocket to ensure functionality.
Reassemble and Verify Functionality

Read more: Ultimate Sneaker Cleaning Guide: Get Your Kicks Sparkling Clean!
Tips
- If using a drill to tighten screws, use the lowest torque setting to prevent damage.
- The USB cable is in a tight space; use feel to reconnect it.
- Try blowing out debris before opening the device if the problem recurs.